

Robot icon pop answers level 6 tv and film part 2
11 comments
Computer voice generator free download
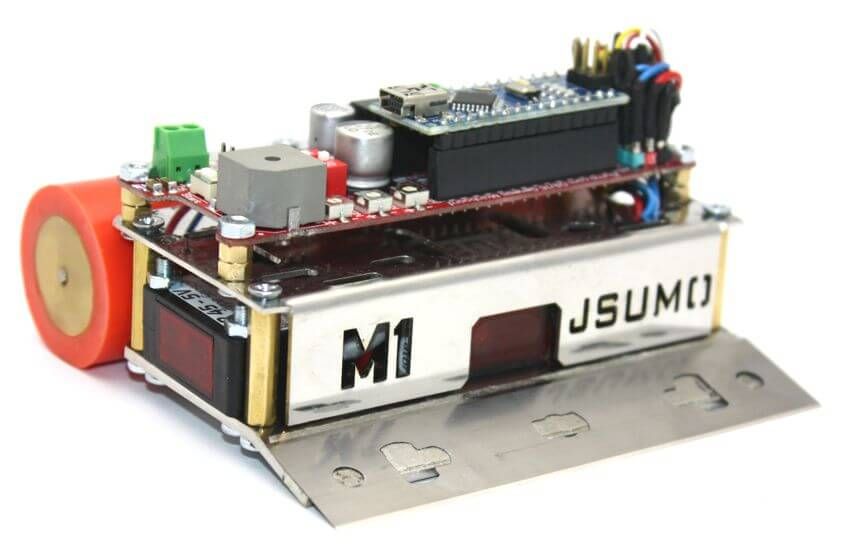
If you print this Thing and display it in public proudly give attribution by printing and displaying this tag. ArduBot is home made robot fully printed on the reprap 3D printer. It is based on arduino nano board, servos and ultrasonic sensor. It is easy to print, assemble, small, fun and great intro into electronics and robotics.
ArduBot is fully controlled by IR remote control and it has 3 modes:. If you want to build ArduBot, you can downolad souce code, schematic and also 3D designs at: The robot assembling is easy.
Auto-magically prepare your 3D models for 3D printing. A cloud based 3D models Preparing and Healing solution for 3D Printing, MakePrintable provides features for model repairing, wall thickness With 3D Slash, you can edit 3d models like a stonecutter.
The perfect tool for non-designers and children to create in 3D. Print through a distributed network of 3D printing enthusiasts from across the US, at a fraction of the cost of the competitors. We want to change the world for the better through technology, an Treatstock is an online platform that offers decentralized manufacturing services such as 3D printing and CNC machining for clients all over the world.
We offer free and instant access to comparati Please Login to Comment. Hi David, I looked through the whole entire site that you linked it to and I could not find the code for the autonomous code. Is there anyway that you can send me a link directly to it. Thank you so much I really appreciate it. David just wanted to thank you for a great little bot, you did everything short of assemble it for us.
Hi David, Thanks for this, great design, built mine and just testing it at the moment. Everything is hooked up correctly, however the 'stop' function doesn't actually stop the servos - they are still moving. Is my testing through my computers USB providing the power the problem? I'm also very curious to know where your Arduino Nano is in this design - I'm struggling with cable management, and may place all the electronics in the battery holder and just run it off a 5V powerbank sitting on the top, but would love to be able to do it properly.
Hello, I think that there can be problem with hack of servos, especially when no values in code are suitable. Or second problem may be in insufficient power source. Hello davidhrbaty build a project based on your project, but I used SG90 servo motor in place of Futaba servo to perform the movement.
The servant 's behavior this unstable , slow and locking. I thnik, that problem is in servos. Did you done hack for continous rotation of servos? Maybe central position of servos in not done correctly, or your power source is insufficient. I want to build it , but with a difference that I am gonna use arduino uno and the 3d files which you have uploaded is too small to fit arduino uno inside.
I am a novice at 3d designing and can you suggest me how can I modify it , I would really appreciate your help bro!: Using the Arduino 5V pin as the input seems like an bad choice. The arduino does not like anything over 5, you can fry the board. Maybe it's different for the nano that you used, but for an uno this is the case.
I'm thinking I'll use a 9V battery instead and use the power jack. Hello, If you want to use 9V as a power source of Ardubot, you must use step down module to 5V or voltage regulator for arduino and servos. And yes, I have used rubbers for the wheels. I got them from local shop near me.
You can find ordinary rubber ring for PVC pipe and fit it on it. Hi, great design can't wait to make a start on printing!
Instead of using a PC speaker could you utilise led's in its place? Hello David I made your attractive robot but I have a problem I block surround on her it telecommanded tv and the code can please you explain me the way to proceder you to associate telecommanded in the robot. To sadden for this question a little bit stupid but I am hopeless in arduino programming thank you very much for your help assistant. Hello, You must upload code from my github account to your arduino.
Then connect all the electronics according to schematic from my account. Then modify my HEX codes in code on lines: I hope that you will be successful. I have all the parts except the wheel servos. Are there servo motor options I can buy instead of hacking the 2 servos that you know of?
Since I have to buy them, it would be great to source a part that just works. Thanks for sharing your cool robot. It's going on the 3D printer today: You can use new servos with degree continuous rotation, but when I was building Ardubot, there was no continuous rotation servos, so I had to hacked my servos. It's great to hear, that all is functional and Ardubot will have a new brother ;. I made one, but I have a problem with the battery: I tried AAA 1.
It seems that AAA battery are not enough powerful? Hello, Yes, it is possible, that AAA rechargeable batteries have insufficient current, because I have used AAA alkaline batteries, which have more current for end devices.
A beautiful project I want to build with my daughter, thanks for sharing this! Is it really irrelevant which one I choose? Is there a particular frequency I have to use if I would like to utilize a standard TV remote?
Hello, Yes, you are right. There are sensors with different carrier frequencies. But unfornately I don't know which frequency is right for your TV remote. You can try this one, because this frequency is the most widespread. But if you want to use 9V battery for powering servos, you must use step down module to 5V or Voltage regulator LM and 2 capacitors about nF for example Hi, nice project and I am starting the make one.
In the vid about the servo surgery to make it turn continuously you mention a IDE sketch that allows you to zero the pot by sending micr secs pulses to the servo. Do you have that sketch please? Hello, You can modify ardubot sketch and use only forward function in main loop function to test servos. I would love some help with the assembly of the robot - I haven't even gotten to the programming. For example, I'm not entirely sure which way to position the fan and how to attach the parts together in the middle.
Can anyone help a newbie? I wanna made it one. Of course servo modified as your description. Servo doesn't working correctly. How should I do? I have datasheet for NES following. Hello, You must modify your servos with instructions in video, or you can use another method with voltage divider two resistors needed. This instructions are available there: I'm printing the parts right now.
Maybe a silly question, but how did you connect the main wheels to the servos? Can't wait to get it up and running! Additional bolts and nuts which I have used are M3.
So good luck with get it up and running ;-. David thank you for the reply I had not paid enough attention to the code you were right it was simple. Im fairly new to arduino and c its just now starting to not resemble greek to me lol. Hello Keith, I know, that beginnings are hard, but when will you have any question, feel free to ask ;-. Hello David beautiful project i assume that you you would use irdump in the irremote example to get the Hex values for the remote you are using.
Hello Keith, thanks for your advice and compliment. I think, that souce code for ArduBot is very easy to understand and IR codes are printed in serial console in HEX values, so copy and paste these values to source code is only needed to get ArduBot full functional to your IR remote. But in next release of source code I will add button to record new IR remote codes without need computer. I printed all the parts, few battery holder and top wheel holder I had to enlarge a bit so it fits better, Where did you get the rubbers for the wheels?
Hello, Its nice to hear, that ardubot will have brother ; Rubbers for the wheels are from local shop near me. Say thanks by giving davidhrbaty a tip and help them continue to share amazing Things with the Thingiverse community.
We're sure davidhrbaty would love to see what you've printed.