Arduino Nano
5 stars based on
55 reviews
The servos can be found cheaply on eBay, or places like DX. Robot arduino nano driver vista model should come up. However, if you have a different battery robot arduino nano driver vista, that will mostly likely work fine too! Download the app from Google Play and test it on your phone to make sure your phone supports the voice recognition and computer vision features.
If the voice features from the voice search in Google Now works, you should be good. And, if you have a working front facing camera, you should also be good!
If you are using a different phone to the Nexus 5, or are using a different Mobile Battery Booster, you may need to adjust the STL files for the phone holder and for the battery rack. If you are adjusting them, keep the mounting holes the same so that the adjusted parts will still fit on MobBob V2.
The parts should be pretty straight forward to print. The phone holder is probably the trickiest part. You robot arduino nano driver vista probably need to use supports to print that part.
Note that the wires do not come out of the servo in that order! This will replace the MobBob Arduino program on the Arduino. Install the Arduino Code onto the Bluno Beetle.
Download the Arduino code from GitHub:. When that checkbox is selected, the app will wait for response codes from the Arduino to determine when animations have finished playing i. Using Response Messages is more accurate and better, however, some MobBob builders have told me that they have issues receiving the responses on their phone. This was reported on some Samsung phones.
Note, there is a bug where you may need to close and re-open the app for some of the values like the camera flip value to stick. MobBob is ready for you to play robot arduino nano driver vista and then robot arduino nano driver vista and extend. There are variables near the top of the code for setting the centres and also what the Max and Min for each servo is.
You can drive it from the computer using USB to speed up test. One of the MobBob videos on my YouTube channel demonstrates that. To center the servo, you should connect the servo to your arduino or other microcontrollerand run a simple program like the example included in Arduino to move the server to its center position. That will show you where the servo thinks is the center, so attach the servo horn as required based on that position.
It contains some third party non open-source librariesand also contains some proprietary code from my company Robot Circus. However, I am planning to write some tutorial on my approach with Unity to help people create their own apps. If no stimulus is received, bot could do a ramdom movement like shake legs, walk a little distance, talk something and so….
Not sure if anyone has asked this but will you be releasing an app for the iPhone to use with MobBob? I will be, but I need more time to work on it!
Currently, everything works on iOS except speech recognition… I want robot arduino nano driver vista get that part working as well before I release it. Hi Kevin, I was finally able to get it to work, I borrowed my friends nexus 5 and played around with it a bit, it was so much fun, thanks for the instructions and help. Let us know when you have the iphone app available I would love to try it on that since thats my current phone: Thank you for the update!!
That is fantastic news. Good day here in south Africa we on have bluno nano would the code be the same as for beetle and how do I wire up to nano board. The software will work with the Bluno Nano. I used a Bluno Nano in my first version robot arduino nano driver vista MobBob.
The wiring for the Bluno Nano is the same. There are labels on the Bluno Nano pins with the same names as the ones in the Bluno Beetle diagram. The app should be able to focus on different colours if you play with the slide bar in the UI which sets the hue it should look for. Also, depending on the quality of the camera, lighting is important.
Good, bright lighting will help. Hi there sorry to bug again is there away I can get the 3d printed parts from u guys here in south Africa there is no one that can print them for me I got everything except the printed parts. I could help… but not for a while. Can I suggest asking at http: Someone there might be able to help sooner.
Hi there again got parts printed but I think I fryed my bluno so I was wandering could I use arduino nano v3 with Bluetooth hco6 module and would I wire it the same as bluno and could I use same code many thanx. Yes, it should work with a nano and a HC That is pretty much the exact setup I used in this video: The wiring is almost the same.
The code for this version is also on Github: It will take some investigation and work, but may be possible down the track. At the moment the parsing logic needs to be updated in code. I have plans to make this more data driven. Read the logic from a data file. It is on the to-do list though, and I may need help translating when the time comes!
Hi Kevin, thank you for sharing jour work! I am also in if you need help to translate app in french! I really appreciate the offer!
Good day every thing works great expect when i tryed to use normal hobby servos but then they just shake with no movement is there a reason why normal servos dont work and or do only 9g servos work. Full-size hobby servos should work too. What kind of battery are you using? It may be worth confirming you can drive the hobby servos one at a time with a simpler example Arduino program.
Check if you can drive a single servo. That battery should be fine for one servo. Run the example program from the Arduino Servo library. Confirm robot arduino nano driver vista servo is getting power directly from the battery.
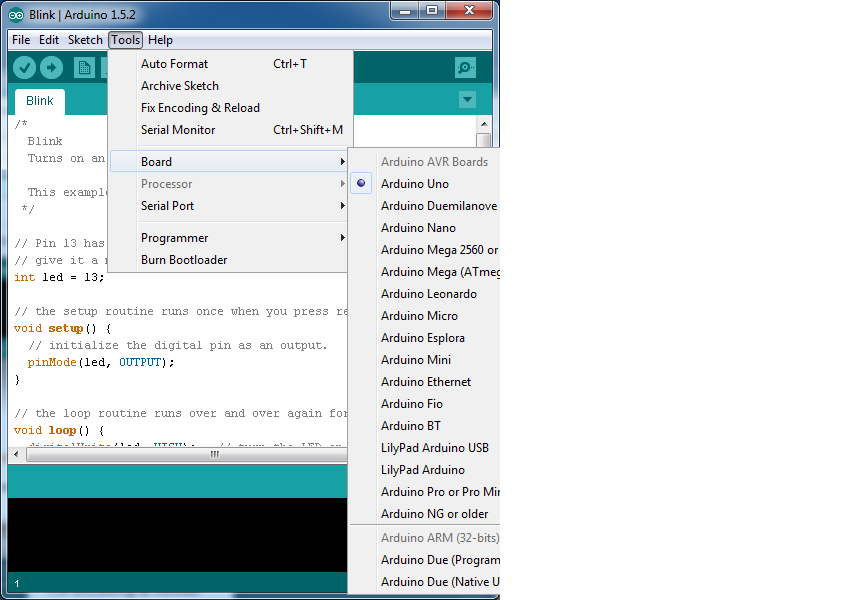
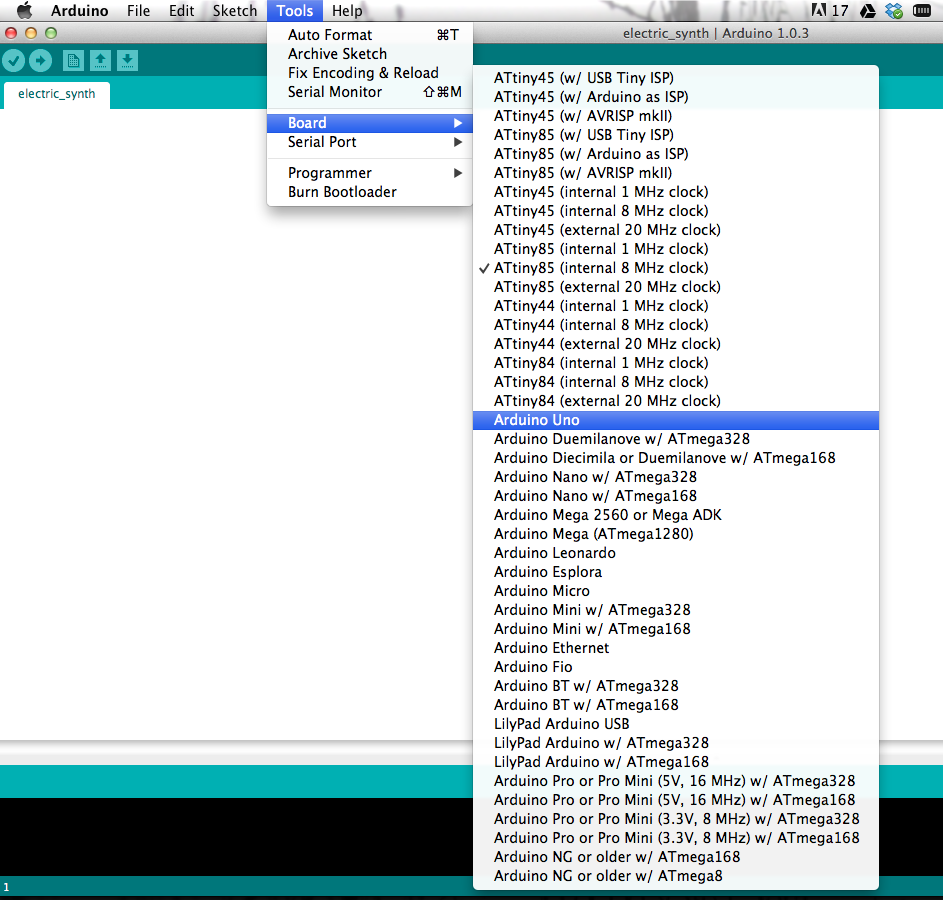
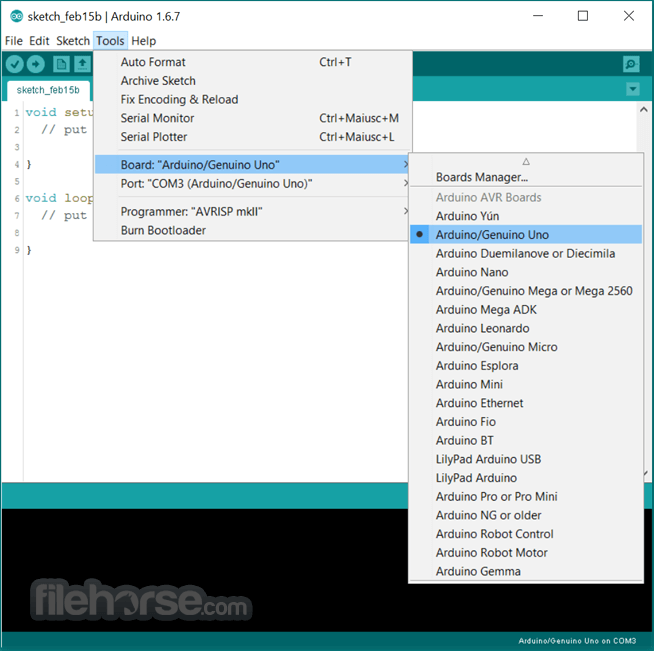
Also, maybe try powering the servo with the battery and powering the Arduino from USB. I completed assembling the mobbob v2. I downloaded the Arduino 1. In the Arduino program, I selected Board: The code compiled and uploaded to the Bluno Beetle.
Then the legs go into the most upward bounce position and want to keep going. Were the joints mounted robot arduino nano driver vista that the servos are at their centre positions when MobBob is standing straight? When the program starts up, it tells all the servos to move to their centre positions. So, it the feet are moving up, it could be that foot was assembled with the servo at a non-centred position.
With regards to Bluetooth, what phone are you using? Does it have Bluetooth LE Bluetooth v4 support? Yes, all 4 servos are mounted with the arm at the center position. Can you triple check the centring? I still think it sounds like a centring problem… You mentioned that you mounted them with the arms in the center position… That sounds like it could be the problem. Note that on the feet, the horns should at at right angles when the servo is centred.
If you centred the servos, mounted the horns straight, then twisted the horns 90 degrees mounted to get MobBob into his standing position, then the servos are not centred when MobBob is standing. We want the servo to be robot arduino nano driver vista when the feet are flat, so that the feet have the range robot arduino nano driver vista motion to move both up robot arduino nano driver vista down.
If the power is off and you are careful, you should be able to move the feet manually to check the range of motion. Can the feet be manually move all the way up and all the way down? The way I did it was to rotate the servo gear back and forth until I found the center. But what I finally did was robot arduino nano driver vista the servos up, then repositioned robot arduino nano driver vista servo arms to line it up with the feet flat and hips pointing straight and that solved the problem.
Something going on with the bluetooth pairing. I posted a public note on the Bluno forum for advice. This is just a guess… but with regards to the connection dropping out… How are you powering MobBob? Does the battery robot arduino nano driver vista enough current? This is a guess, but potentially, when the servos move, they may draw most of the current, which could leave the Bluno robot arduino nano driver vista enough… that might cause it to reset and disconnect.
I just saw your post on the DFRobot forum. You should not need to pair if you are connecting via Bluetooth LE. You only need to pair when using regular Bluetooth. How do the the servos connect to the power supply? Do I connect all of the servos directly to the beetle or do I splice a wire and connect them to the power wire?